Balloonium Game Lightning Shader
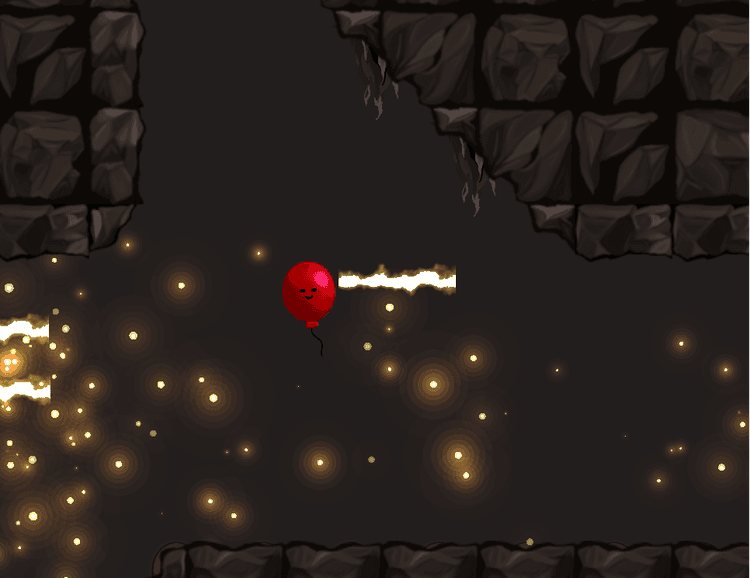
Click on the balloon to see the zap!
Design Iterations:
The Problem
In the Balloonium video game, we want the playable character to have a lighting attack ability, which can be used to strike enemies. The ability needs to be charged before use, so we need to create a visual effect to convey the status (reached charge, has charge, using the ability unsuccessfully, and using the ability successfully). Further, this needs to be implemented in a custom C++ / OpenGL game engine with few extra features.
Background Research
I found this video by Gabriel Aguiar Prod. that provides a possible approach. It uses Unity Shader Graph to distort a rectangle to give it a lightning-like effect. Then, it applies a glow effect and finishes the effect using Unity's particle system. Our game engine did not have a shader graph feature. It also does not have any built-in glow effects, or (at the time) a particle system. However, I felt as though this general technique could still be used for a good effect
Specify Requirements
The requirements for this effect are:- Can be implemented in our barebones OpenGL / C++ game engine.
- Provides a convincing cartoony lightning effect that is consistent with the art style.
- The lightning should have a glowing effect.
- Variable-length lightning bolts, so they extend only to the enemy and no further.
- A fully-charged effect that changes enough over time so that it remains interesting to look at.
Brainstorming
There were a few strategies that came to mind. We had already implemented sprite-based animations, so we could simply create animations for the effect. However, I wanted something a little bit more dynamic and flexible. This brings me to my second option — a shader effect. Since we don't have a shader graph (and anything that comes with it, like built-in noise functions, shapes, etc), we will need to implement the shader manually using OpenGL's shading language, GLSL. Like the reference video, we can create a rectangle for the lightning shape and distort it with noise. We also don't have a glowing effect, but maybe we can fake it by adding a slightly larger distorted rectangle around the lightning bolt and fading it out based on distance. At this point in time, I was not so focused on points 4 and 5, but I thought they should be achievable with some yet-to-be-formulated shader techniques.
Iteration 1
Shadertoy: Click Here.To build my first iteration, I first needed a noise function written in GLSL that I could use. These can be mathematically complex, and potentially slow. I found this noise function by Inigo Quilez available online. It looks good, and has the benefit of not using any trigonometric functions that I've heard can affect performance (although this may be an optimization not worth worrying about).
With this, I created my first prototype, which can be seen here. Please check it out, as the effect doesn't translate as well in an image.
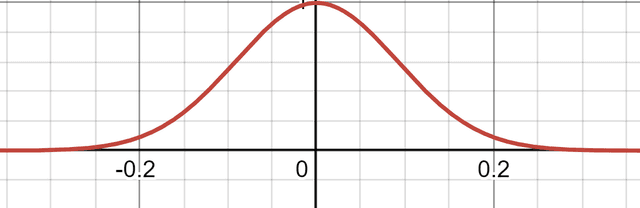
I create the rectangle shapes by checking the fragment's y coordinate. By adding the noise values to the fragment's coordinate before checking the y-coordinate, I am able to create the distortion effect. I will make the glow transparency a bell curve centered at the rectangle. The glow is also distorted, but to a lesser extent.
The glow strength is set by a bell curve.
This still didn't give me the effect that I was looking for, since it did not follow the shape of the lightning enough. Next, I will try to modify the glow effect so that it follows the shape of the lightning more.
Iteration 2
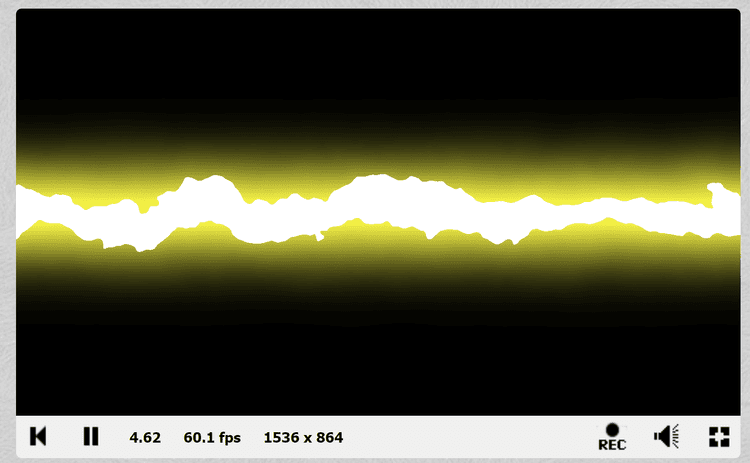
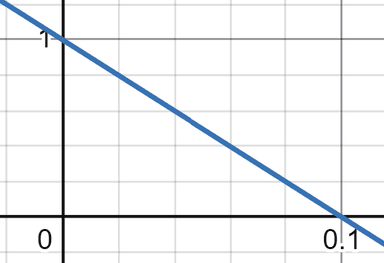
Shadertoy: Click Here.In this iteration, I want the glow to follow the shape of the lightning a bit more. To do this, I added another rectangle check for the glow, and I changed the glow fall-off to be linear. The glow distortion is the same as the bolt distortion.
The glow strength is set by 1-10y
This gave me the following result:
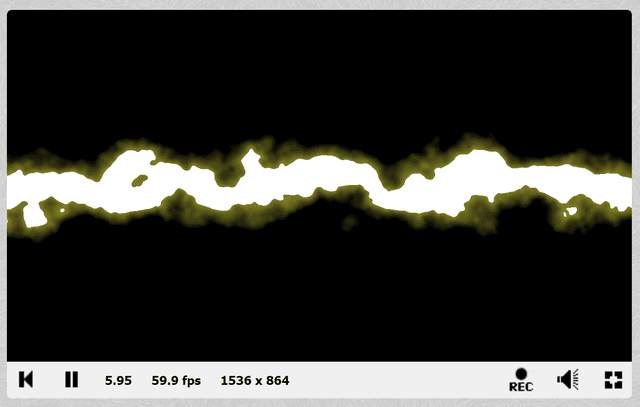
Here it is in-game:
This option would be okay to use if needed, but ideally I would find something better. However, I also needed to find solutions to the other requirements. And that's what I look at next. In fact, taking a break from the glow actually led me to a much better and more flexible solution.
Iteration 3
Shadertoy: Click Here.For iteration 3, I wanted to do some work on the fully charged effect. My vision was to have small lightning bolts surrounding the character. To achieve this, I tried replacing the rectangle with a circle. To do this, I can replace the y-coordinate checks with a radius check. I did not worry about the glow for this one.
Again, this wasn't quite what I was looking for. In this iteration, and previous ones, the area where the lightning appears seemed too rigid and geometric. I wanted something with a more interesting and controllable shape. That's when I had the idea to use a texture. And the beauty of a texture is that I can use all three of the RGB channels to hold separate information.
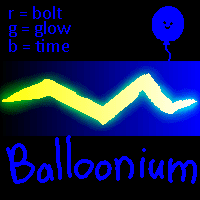
Iteration 4With a texture, I can hold information in each of the Red, Green, and Blue channels. Then, I can sample this texture to determine what to render.
Red - The bolt location. The value is only 0 or 255 (or 0.0 and 1.0 in the shader). This replaces the y-coordinate checks to determine where the bolt is.
Green - The glow information. This channel determines the location and strength of the glow effect. The value is anything between 0 and 255 (or 0.0 and 1.0 in the shader).
Blue - The threshold value. This is used to figure out what parts of the effect to show or hide. This will be explained in more detail later, but it is used to achieve requirements 4 and 5.
It's worth noting that the actual colour of these don't mean anything. They are just channels to store information, and can be used in the shader to create the desired effect.
Another issue I noticed in this iteration was that my distortion was only offsetting the sample position in one diagonal. I modified the function to apply it to both diagonals, and then abstracted it to clean up the main function. This gave me the following code (only showing the relevant parts):
void main()
{
    vec2 uv = getDistortion();

    // sample UV
    vec4 sampleUV = texture(colourTexture, uv);
    float bolt = sampleUV.r;
    float glow = sampleUV.g;
    float threshold = sampleUV.b;

    // thresholding
    float t = mod(threshold_initial_t + (time - start_time) * threshold_speed, 1.0);
    if (threshold < t - threshold_offset.x || threshold > t + threshold_offset.y)
        discard;

    color = vec4(GLOW_COLOUR + bolt, glow);
}
It starts by splitting the texture into the R, G, and B channels with the appropriate labels. Let's ignore the thresholding part for now. The colour is set by adding the constant GLOW_COLOUR with the bolt value. Since channels are capped between 0.0 and 1.0, this is effectively setting the colour to be white when it's a bolt location, and the glow otherwise. Then, we set the glow strength as the alpha (which requires glow strength 1 in the bolt locations).
The thresholding system was created to solve two problems — variable bolt length and variable bolt visibility. The bolt needs to extend to the enemy, but no further, AND the charged effect should show many little bolts that change over time. I realized that both of these are asking for the same thing — a way to control the visibility of certain areas.
Let's say the values in the blue channel represent a point in time, between t=0 and t=1. We can decide to only display the pixel if the current time is some distance away from the pixel's blue channel (threshold) value.
If we have a gradient of values in the blue channel such that the pixel values go from 0 to 255 (0.0 to 1.0 in the shader), we can compare the current time with the threshold value to create a sweeping effect, where the image is slowly revealed from left to right as time passes.
I can control how much on either side of the current time should be displayed using the threshold_offset. Additionally, if I want to only reveal a certain amount without any changes over time, I can just set the threshold_initial_t, and set threshold_speed to 0.
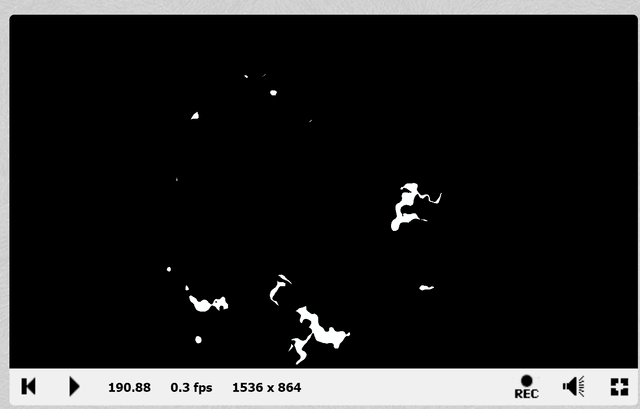
This ends up being quite powerful. For example, here is the texture I use for variable lightning length:
By setting threshold_initial_t based on the enemy distance, I can reveal only a portion of the lightning bolt.
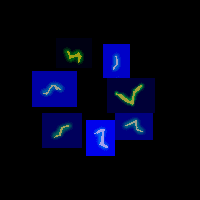
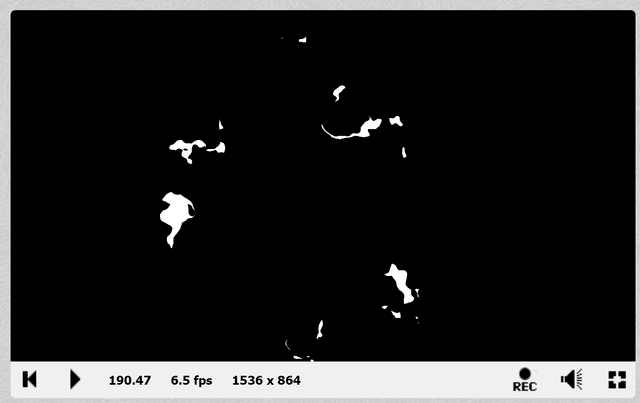
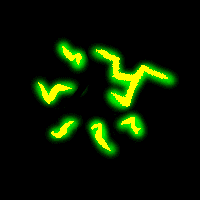
Here is the texture for the has-charge effect. Different bolts have different blue values behind them. As time passes, different sections of the texture are revealed.
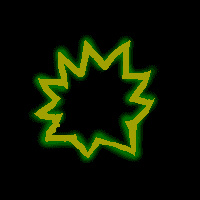
This is for an unsuccessful attack. Notice that the unsuccessful attack is similar in shape to the fully charged effect, but larger and more intense. This was to convey that something was attempted (becomes more intense) but didn't change any state (shape remains the same).
I also created an effect for reaching-charge.
A few other changes in this iteration is that the glow colour was changed to a light blue colour, and the distortion was given a unique random offset so that each instance of the effect looks unique.
This solution met all requirements, and is in-use in the game.
The effect can be seen in this video from 0:39 to 1:03.
Unfortunately, the unsuccessful attack effect is not shown in this video. I plan to add an interactive demo to my website, but it is not-yet available.